- Continue Shopping
- Your Cart is Empty
Garden Notes: Seed Starting Basics

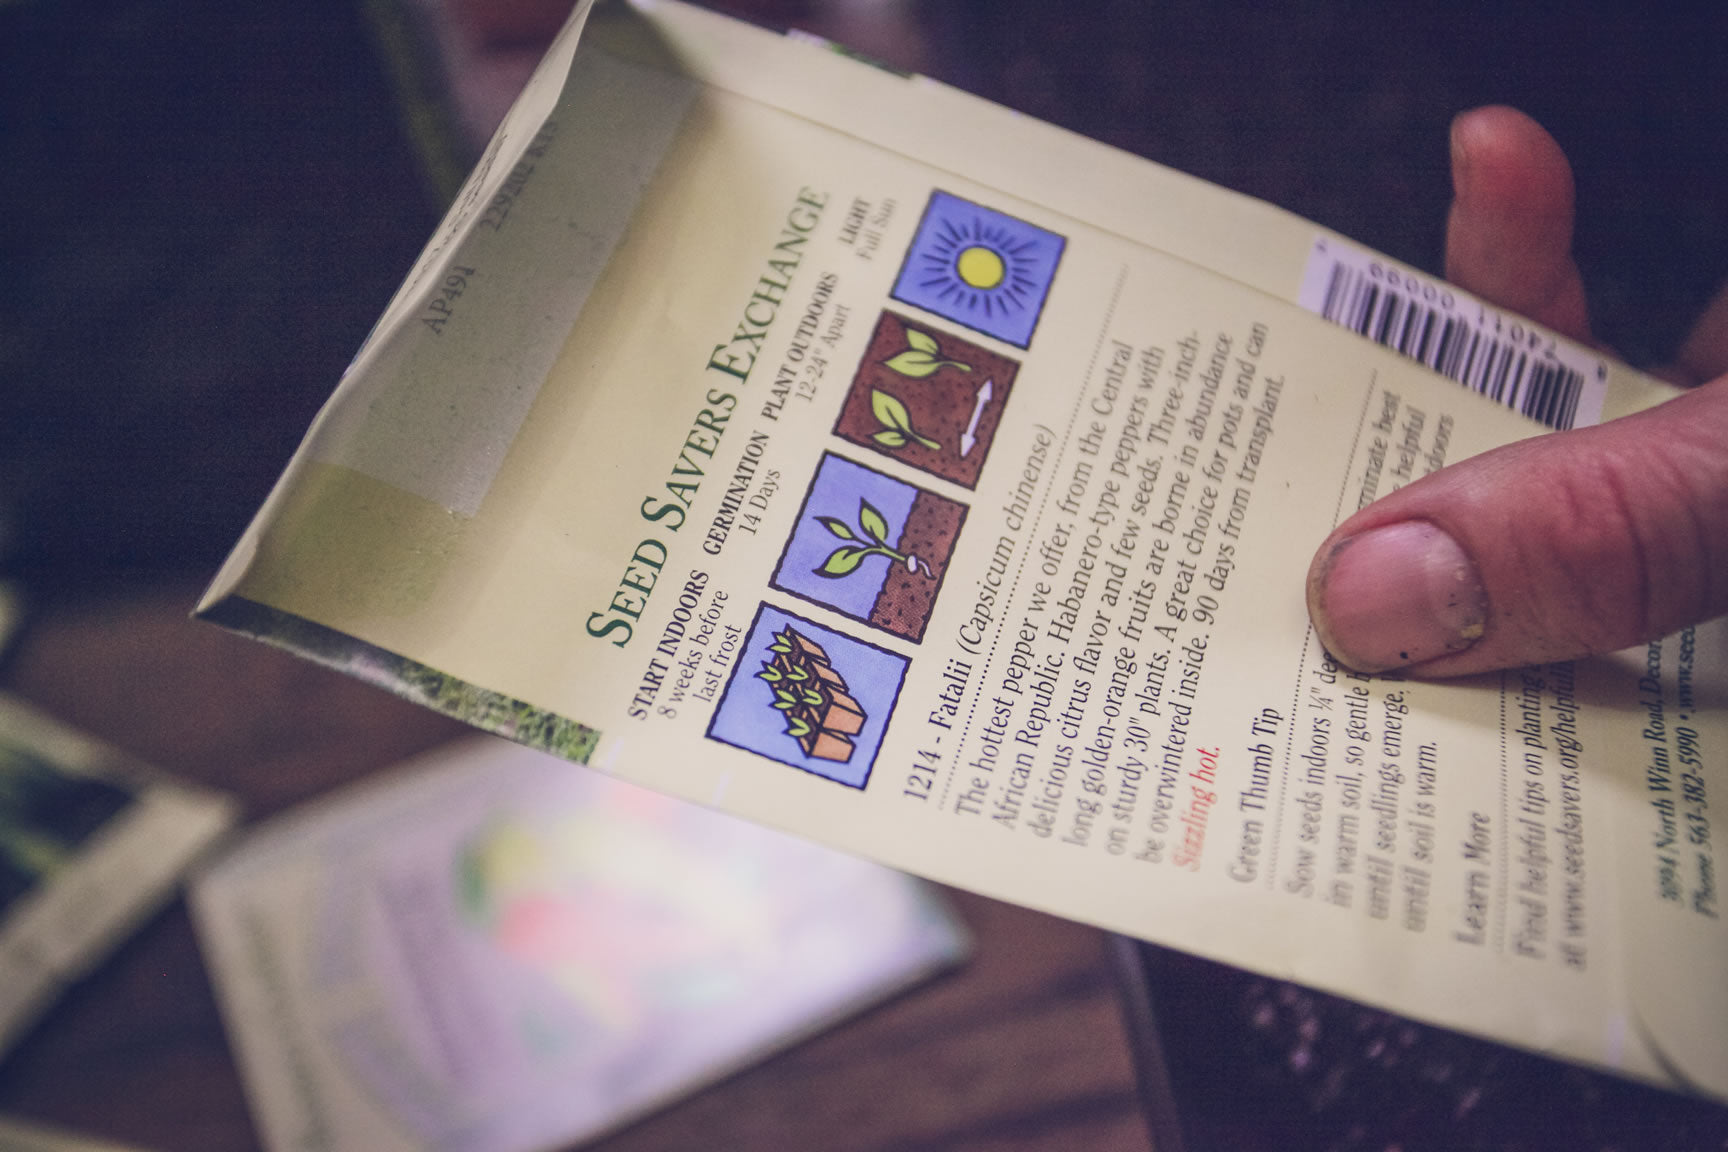
The seed packet, like the seeds themselves, are full of information. Knowing how to unlock the information contained inside is an attainable art. The gardeners and farmers who have come before us have done much of the hard work of deciphering the requirements of individual varieties, and their knowledge is compressed into the fine print that edges every respectable seed packet.
While the language changes slightly from brand to brand, the general information remains the same.
Direct Seed, Start Outdoors:
Not all plants need the added heat and humidity of a seedling heat mat and greenhouse conditions to thrive. Some crops, including peas, carrots, and beets actually do better when they are started directly in the ground rather than being started indoors and planted outside later. Other crops, particularly the ones that hail from equatorial climates, do better with the head-start approach of being started indoors and nursed along for a time, so that they are larger and stronger by the time they are planted outside. Some crops, such as kale and lettuce, can be started using either method. Generally, crops planted outside will germinate more slowly than their indoor counterparts, but they experience less shock from transplant. Direct seeded crops are usually thinned after the first true leaves appear, to make sure that there is enough space for the mature plants to grow without crowding. This section of the seed packet also often includes information about how deep to plant the seeds. Generally speaking, seeds are planted at a depth 2 to 3 times as wide as the seed itself. So, larger seeds will be sown deeper than smaller ones. Some very tiny seeds require light to germinate, but most like at least a thin sprinkle of soil on top.Sow Seeds Indoors:
This indicates the time you should allow for seeds to germinate and grow under protected conditions before “planting out” outdoors. Some seed companies will indicate a range of months that the seeds should be planted in, say Feb-March. Others will indicate how long before the last expected frost date the seeds should be started. The Habañero peppers we just started recommend starting 8 weeks before the last expected frost date. You can find your last expected frost date easily on the web by entering it as a search term, along with town names or zip codes. You may need to count backwards to determine the best start date for you. For example, here in Ben Lomond, Ca., our average frost dates are from November 11-March 31. So those peppers ought to be started by the last weeks of February for optimum growth. It’s worth checking a few sources to get a sense of average temperatures, if you do not have your own data that you have collected. Keep in mind that these temperatures are averages, and as such may differ from year to year. If you’re only a week or two or even three behind, go ahead and start the seeds! But after a certain time, those slow growers will not have enough time to catch up, and it would be better to start with seedlings rather than from seed. Which brings us to…Days to Harvest:
This indicates how long you should expect the crop to reach harvest from the date when it was transplanted outside. Tomatoes can range from 50 days for early, cold-tolerant varieties, to up to 100 days for larger heirloom or beefsteak varieties.Days to Germination:
This indicates how many days it takes the seed to germinate. Species vary widely; a pea may germinate in 4 days, while peppers can take 3 weeks. Knowing what to expect allows the gardener to group seeds with like germination times in the same flat. It’s no good planting, say, peas and peppers together; the peas will be ready to move into a larger container long before the peppers have begun to take off.Planting:
This indicates the required spacing of the seedlings when they are planted out into the garden. Larger plants require more space, so clearly the spacing will be different for tomatoes than for lettuce. If plants that will require staking or trellising as they mature, this is usually listed here.When to Plant Out:
This indicates the correct time to transplant the starts from the greenhouse to the garden. It is often given in terms of the last expected frost, as well. For example, most eggplants and artichokes should be planted out 1 week after the last expected frost, while onions and chives can be set out 3-4 weeks before the last frost. If we get a late frost and the more tender plants are already in the ground, they should be protected with floating row cover.Growing Requirements:
This indicates the ideal growing conditions for the plant. For vegetables, this often means full sun, but cool season crops like lettuce may need protection from hot afternoon sun if grown in summer. Soil pH requirements, pH and fertilization requirements are often listed here, as well as watering and mulching tips.
There is often additional information written in the text on the back of the seed packet. It’s worth perusing to get all the information you can about the particular variety. Some varieties are better at withstanding the heat of summer, or cold, or other climate variations, since there's no official place for this info to go on the packet, it is often worked into the text. This is especially helpful when trying to “stretch” a crop, say by growing lettuce in the summer. Many crops grown or planted at the wrong time will “bolt” that is, go straight from seedling to flowering, without heading up and making a nice head of lettuce or broccoli. Look for varieties that are “bolt-resistant” or “tolerate heat well” when trying to grow a cool season crop in the summer. You can also erect a shade structure to filter the hot sun, especially if they are subject to late afternoon sun, which tends to be the hottest and most damaging to cool season crops.
Starting seeds indoors lets you get a jump on the season; though fallen tomato seeds will often germinate and begin to grow in the garden outside, these are rarely the best producers in the garden. Aside from the fact that tomatoes do not come true from seed, the early exposure to cold will often stunt a young tomato that sprouts up in March, so that it never catches up with the tomatoes started indoors.
Most seedlings appreciate a little bottom heat to germinate. A seedling heat mat keeps the temperature of the soil just 20F degrees warmer than the ambient air, mimicking the effect of sunlight warming the soil in the growing season. If the weather outside is quite cool, the seedlings can be left on the heat for a time after they have germinated, or taken off heat during the day and back on at night. Too much heat can rush the seedlings, but if there’s not enough warmth, they’ll catch a chill. Usually, in a typical year, we keep the seedlings on heat at night for at least a month, as cold nighttime temperatures can stunt the young plants.
To start seeds indoors, read your seed packets to find out the best crops best suited to start at this time. Start smaller seeds in smaller spaces; we started peppers in these small 1x1 cells, but later on in the season, we’ll start larger seeds, like those belonging to squash and melons, directly into 6 packs, or even 3’ or 4’ containers. Starting smaller seeds in smaller spaces, however, allows for more efficient use of the heated seedling space. It also encourages the roots to grow in a dense pattern that makes transplanting easier later on. Larger seeds usually germinate and grow faster than smaller ones.
Use a seedling mix, not regular potting soil; seedling mix has less organic matter in it, so it is less prone to issues of mold and other fungi. It drains well and does not overwhelm the young start with too many nutrients at the outset.
The seedling medium should be damp but not soggy. Scoop it into the starting trays and level it out. The soil should be loose and fluffy, not compacted. Fill the trays to within a 1/4” of the rim. If it is too full, water will run around between the cells, potentially carrying seeds with it.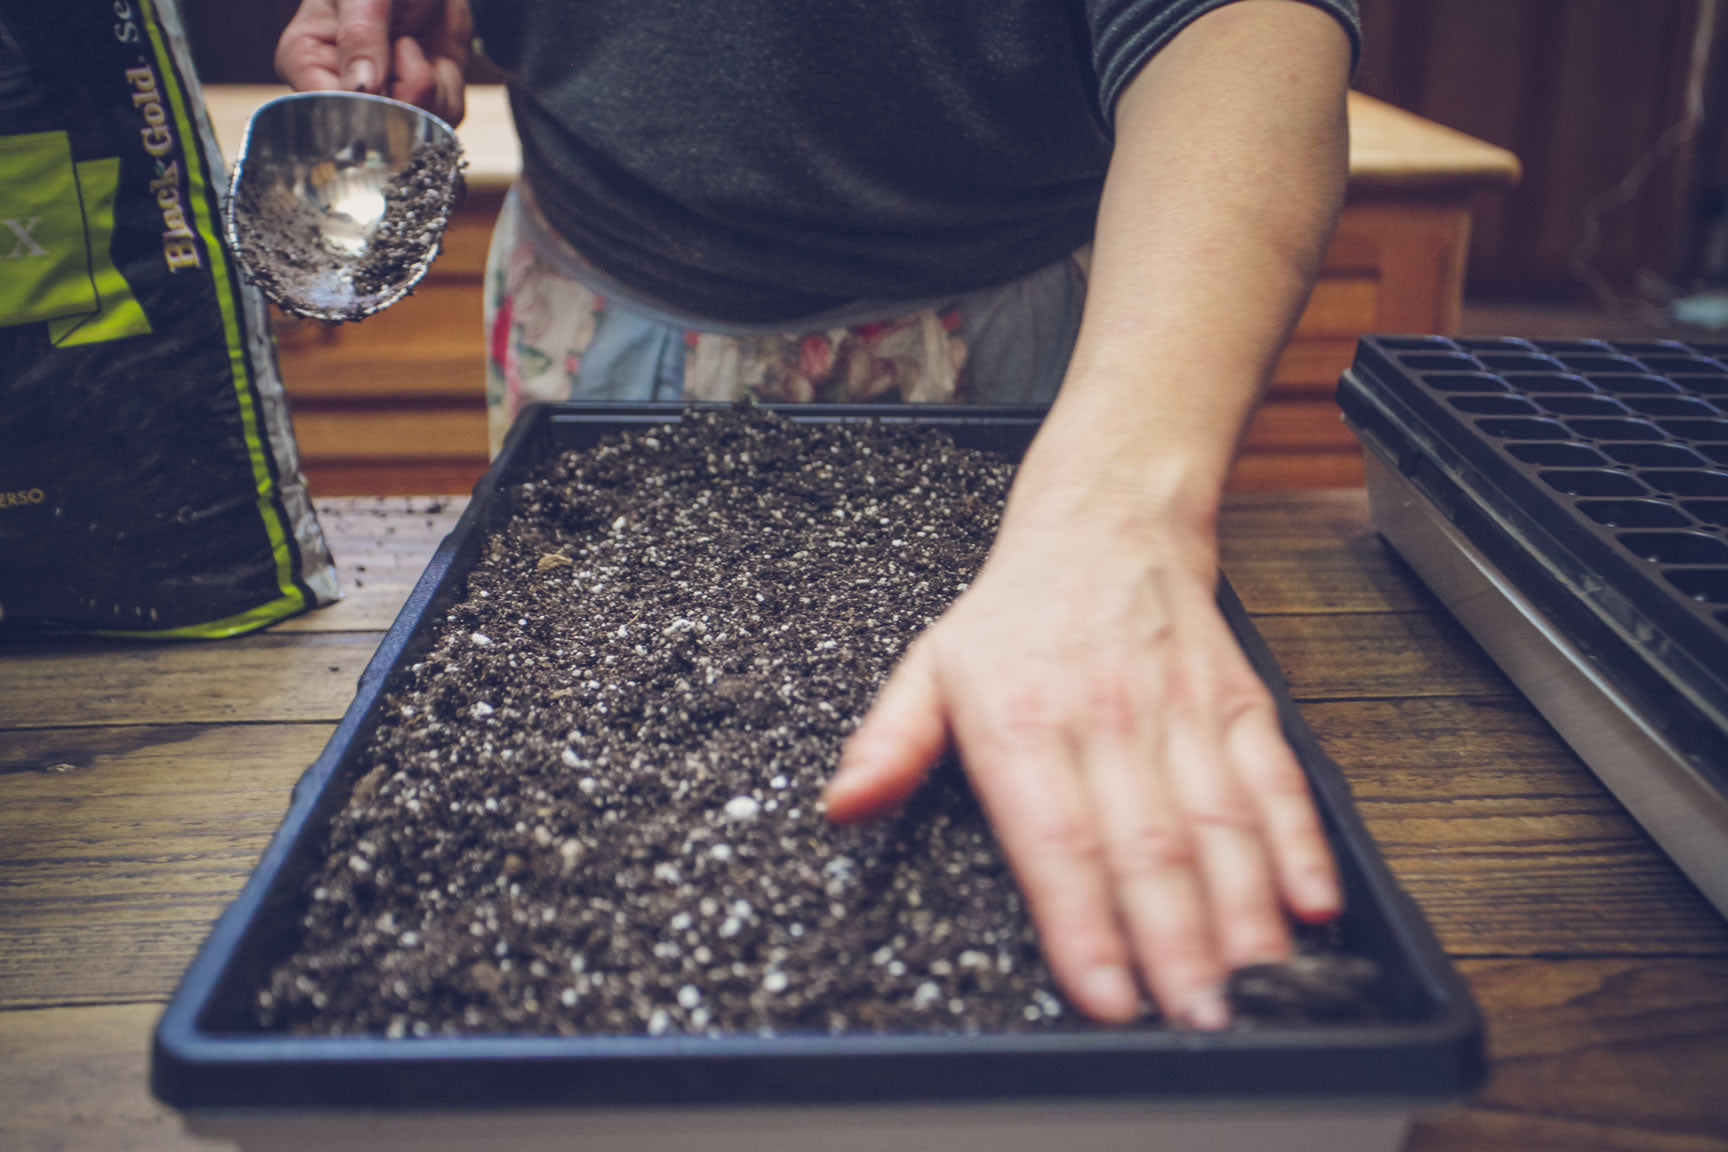
If planting in trays with no dividers, make a slight furrow with a pencil, coffee stirrer, or another slender implement.  Place the seeds at the appropriate depth, and cover with soil. Seedlings planted in this way will need to be transplanted up into larger containers at a later date, but it saves space in the beginning and lets you choose only the best seedlings to grow on to maturity.
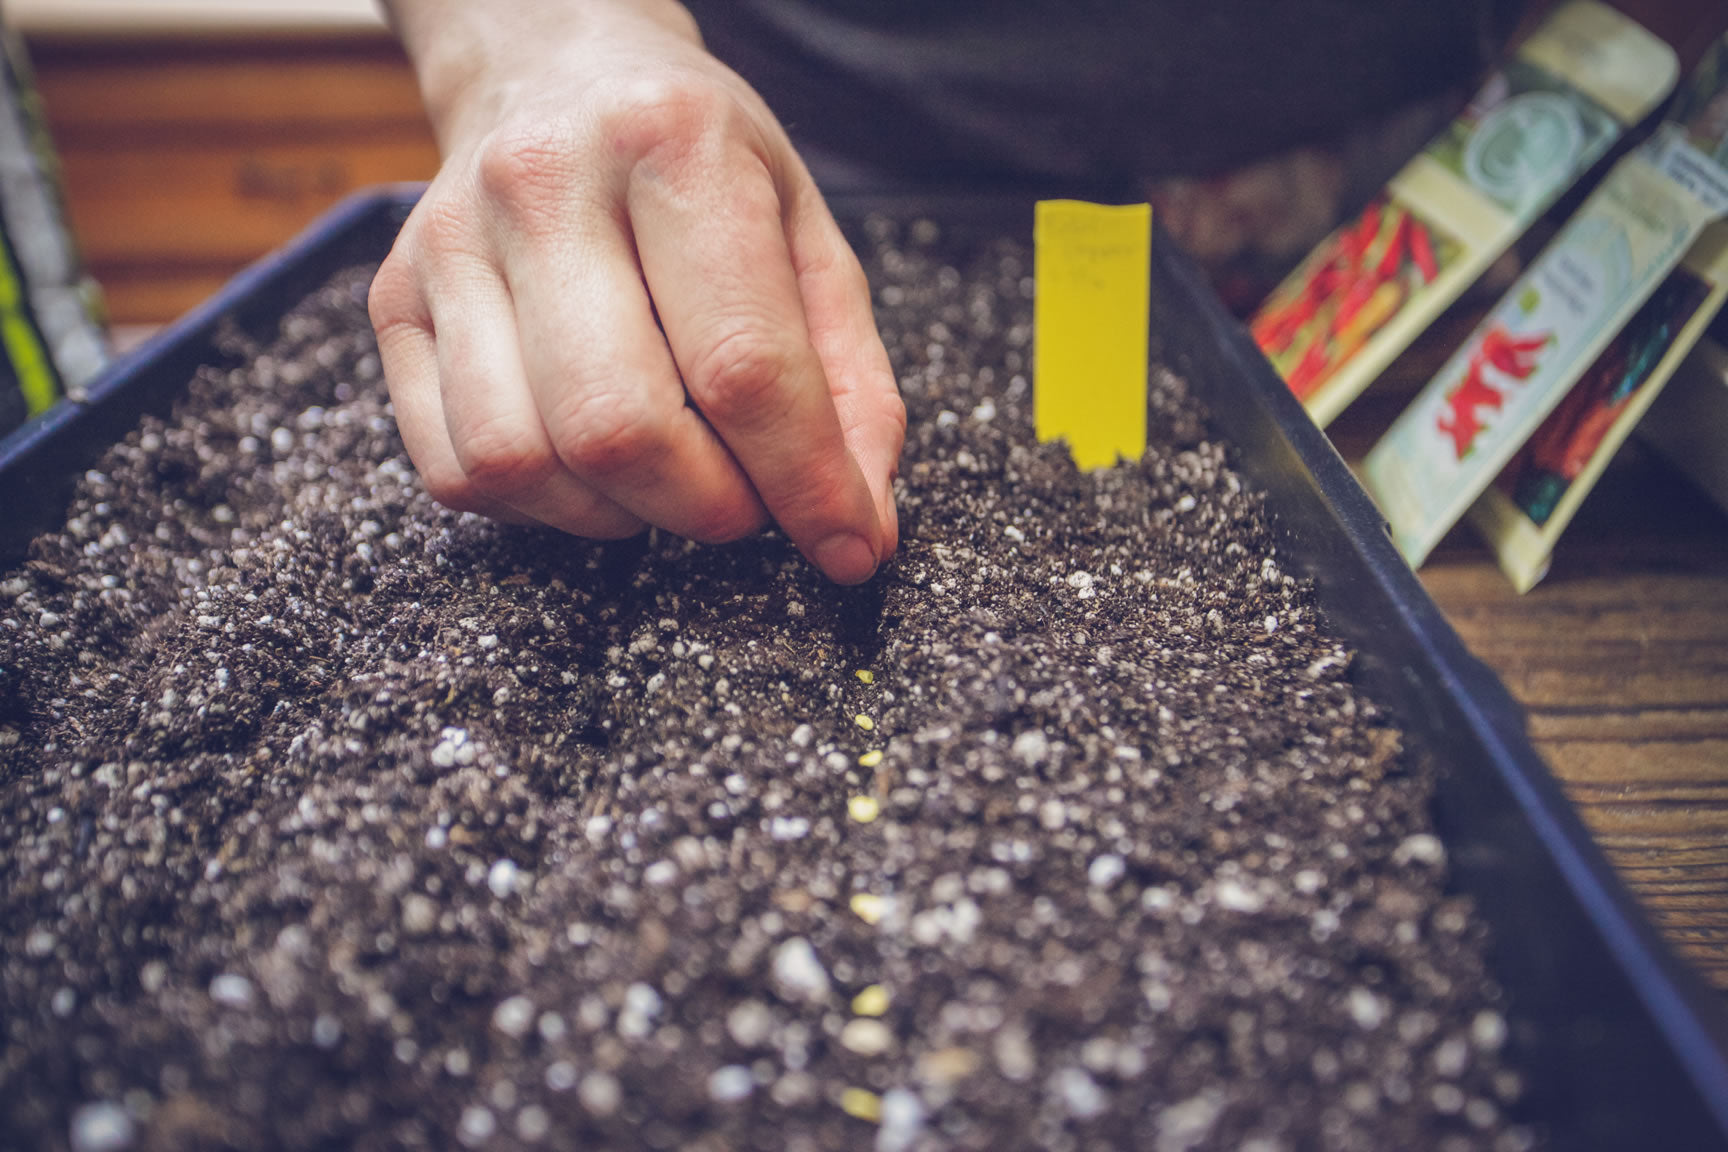
Water the seeds lightly after planting. Water should not pool on the surface, and flood the seedlings, which would dislodge them and potentially damage their roots. Water gently as a spring rain. A gentle spring rain, that is…Keep the seedbed evenly moist but not soaking. If solid trays are used beneath the planting tray (which should have drainage holes) take care that the water does not pool beneath the root zone and cause rot. Generally, solid trays are only used in places where water would be undesirable to drain out, ie your living room window sill. In a greenhouse situation, it’s cleaner and better to let the water drain away.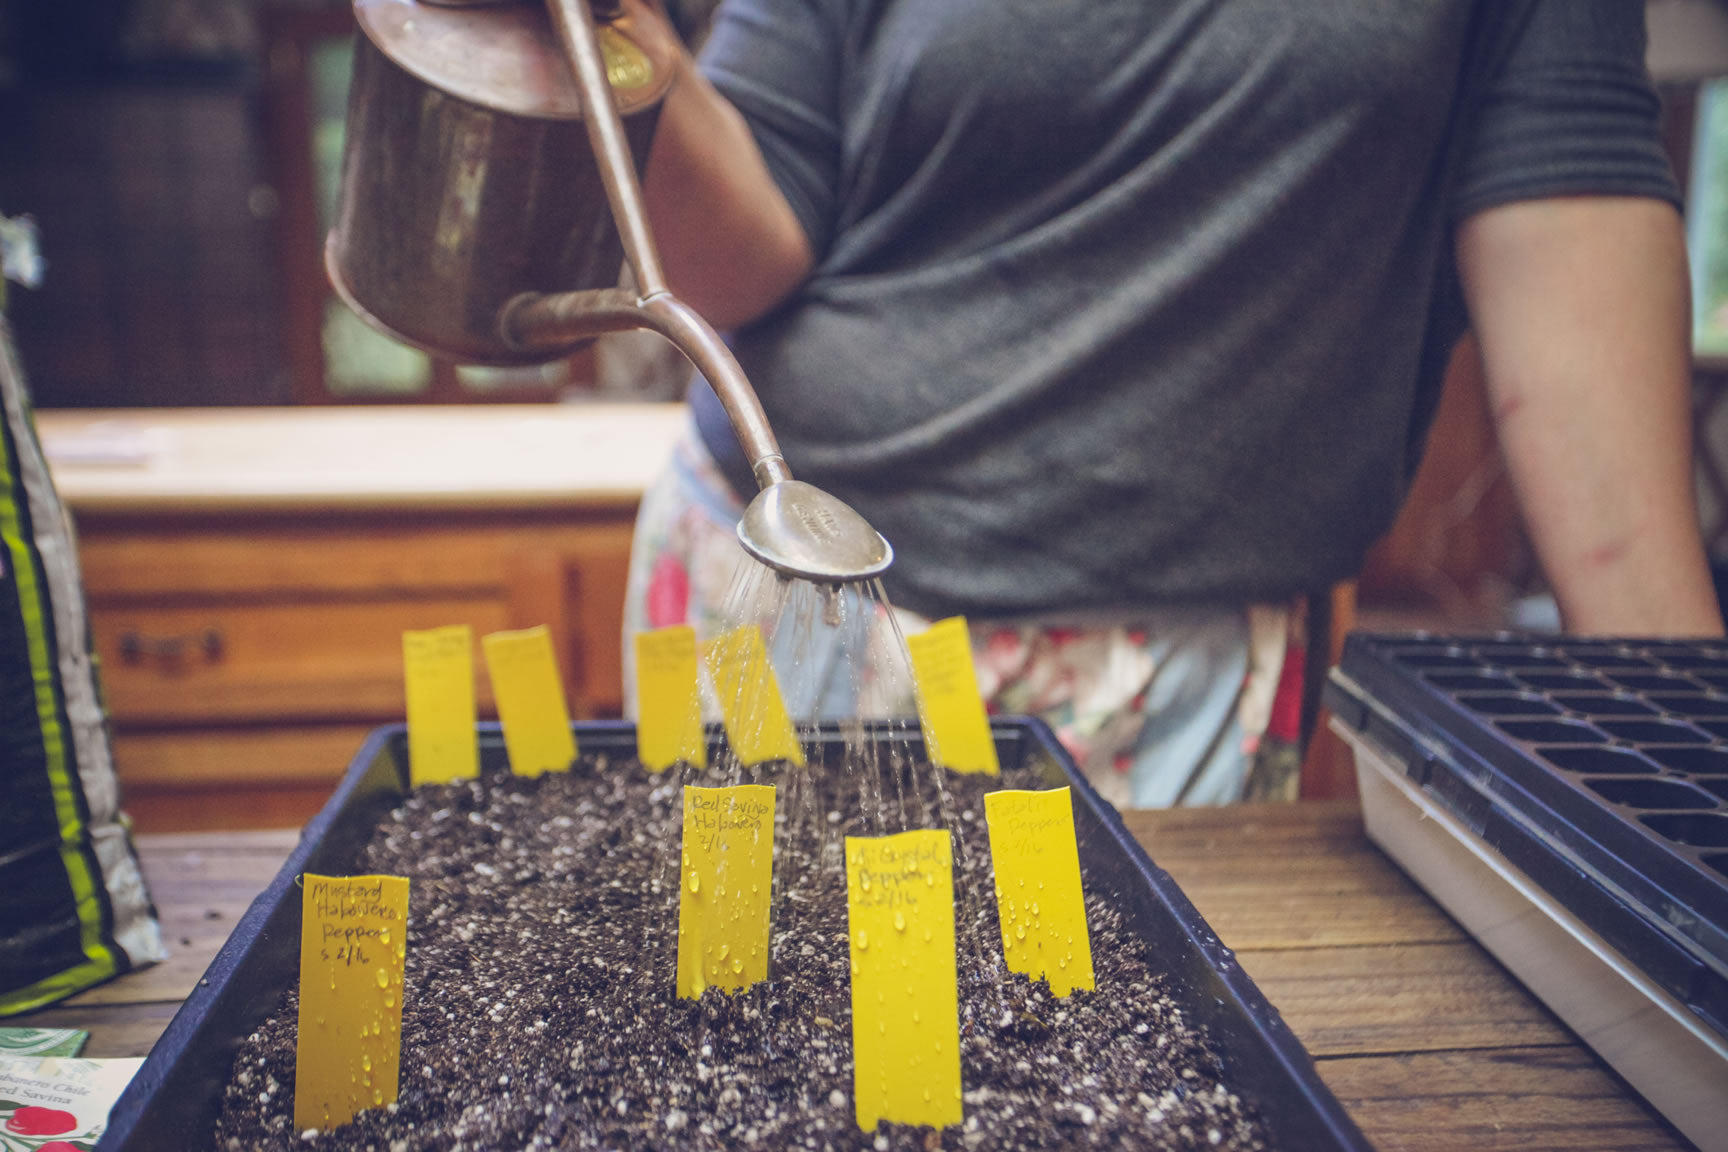
A moisture dome is essentially a miniature greenhouse that attaches to the top of the seedling tray. It keeps the soil warmer and traps the humidity. Warm, moist conditions are best for germinating seedlings; once they have sprouted and sent out true leaves, it is best to remove the dome. Adjust the vents on the top and sides of the dome to allow air to circulate. They should only be closed if there is an extreme freeze anticipated, and then only for the duration of the cold weather. Air flow keeps it fresh and discourages mold from forming on the surface.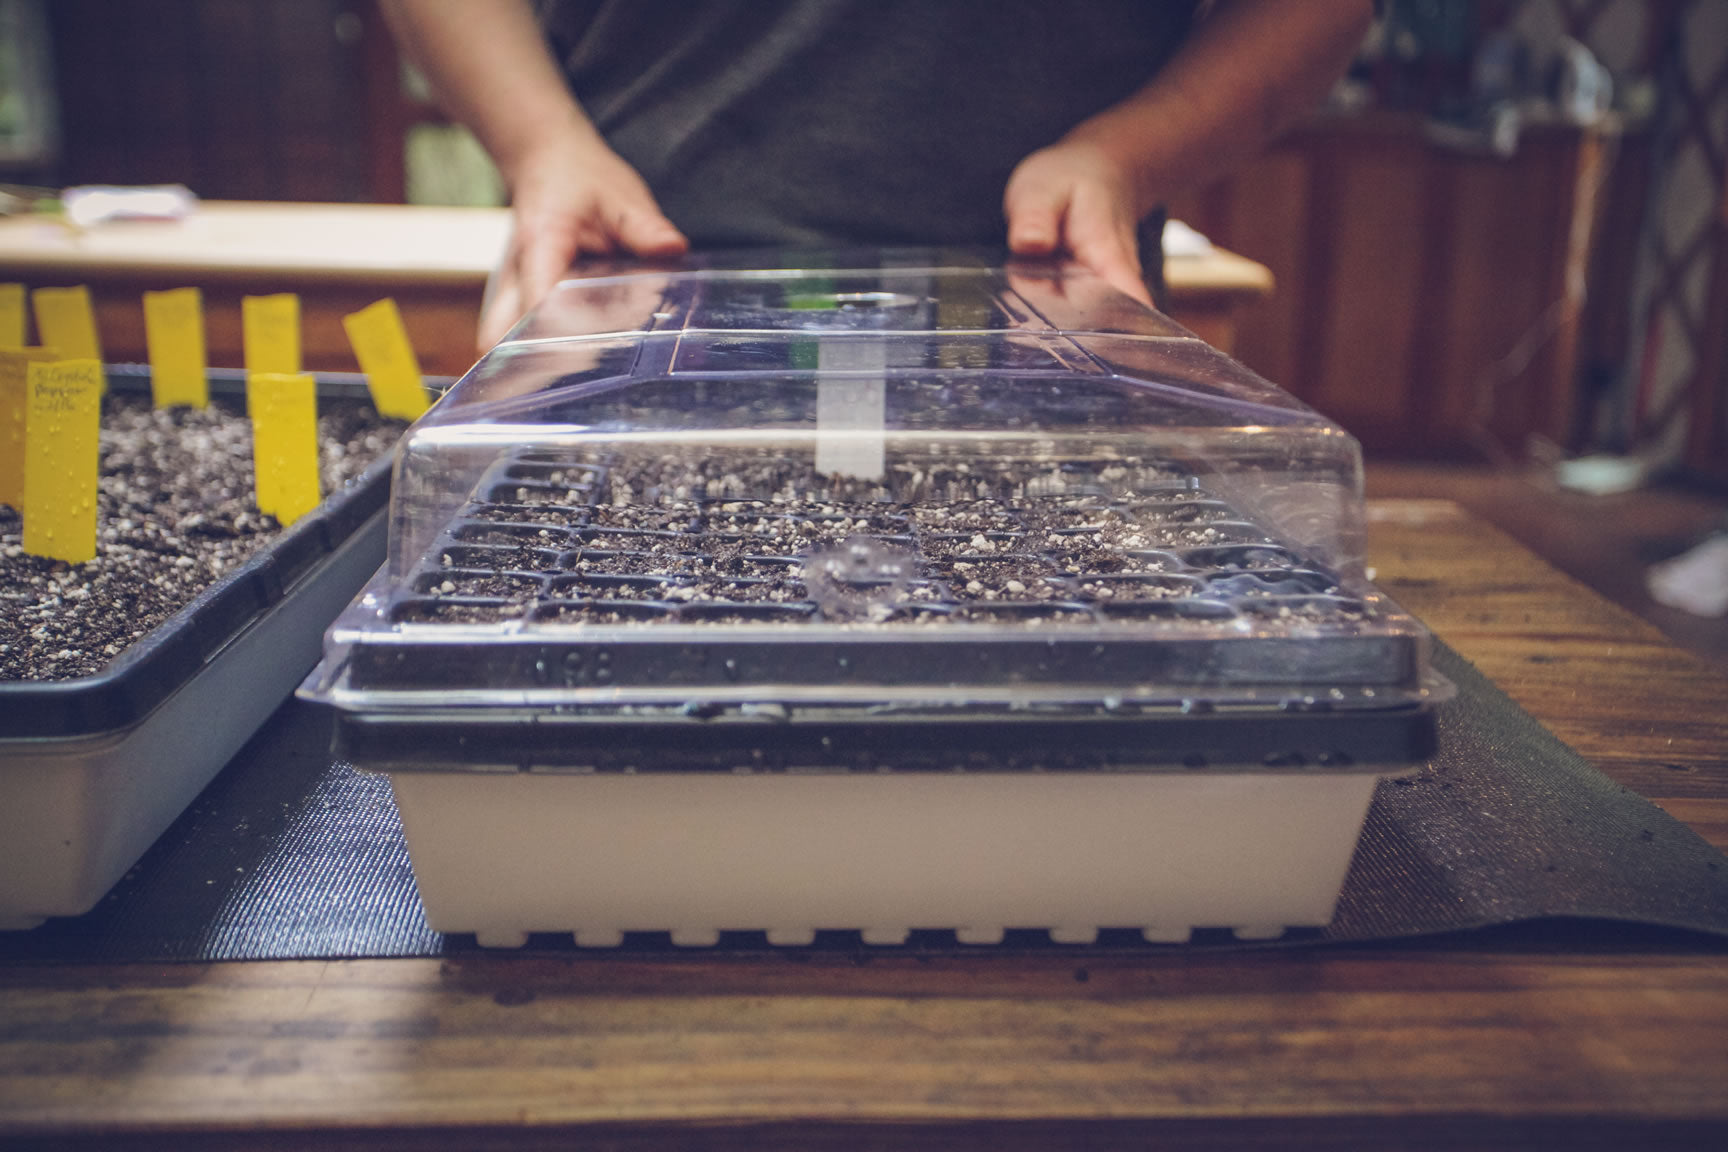
Keep the seedlings in a bright spot that gets direct sunlight for at least 10 hours a day. A sunny window can work under the best of conditions, but if there is too little sun, the seedlings will get leggy and spindly and starved for light. You’ll see them start to lean in the direction that the light is coming from, and they may appear pale if they are not getting enough light. If needed, a full spectrum grow light can be used to give the seedlings 10-16 hours of light.
As the seedlings mature, they will need progressively larger containers for their roots, if they are not ready to be planted outside. When the roots occupy about 50% of the allotted space, it’s time to move them up to a larger container. They should also be “hardened off” as it comes time to plant them outside. This means that they should be taken outside during the day when the weather is not too cold to get used to outside temperatures and light conditions. If the nights are mild, they may be left out overnight as well. If it gets too cold, they can be brought inside, but it is best for the plant to be somewhat acclimated to the environment that it will be planted into for at least a week or two before it goes into the ground.
As the time comes closer to plant the starts outside, prepare the ground in readiness for them. Amend the soil with compost, if necessary. Dig a hole slightly larger than the root ball of the plant, and mix an appropriate organic fertilizer into the soil at the bottom of the hole, if desired. Be sure to mix the soil and the fertilizer together so as not to shock the young roots with concentrated fertilizer.
The seedlings should be removed gently from their containers. The roots should be encouraged to spread out into the surrounding soil. Sometimes, this means that the root ball should be broken apart slightly so that the roots do not just grow in circles. If a few roots have to break in order to spread the entire root ball out, that’s better than having a rootball that is too constricted.
Water the starts well, and keep them watered well as they acclimate to their new life in the garden. With any luck, and continued care, you’ll be harvesting fruits, vegetables, and flowers all season long.
Over to You
It’s part of our mission here at Mountain Feed to help you grow beautiful, sustainable, gardens whether you have sprawling acres of farm or just a tiny plot along the highway. Stop by and say hello on Facebook, Twitter, Instagram or Pinterest. Or, as always, you can do it the old fashioned way and come by the store to speak with one of our in-house experts.